 UPDATE 2019 I now use 55 g almond flour, 50 g powdered sugar, 45 g egg whites, 45 g granulated sugar and bake for 25 min at 285F.
Update Jan 2020, lately I’ve been doing 305F for 20min. once again you just nead to learn your oven (going to leave this recipe at 285 though). See my notes in my General Macarons Recipe for the most up to date.
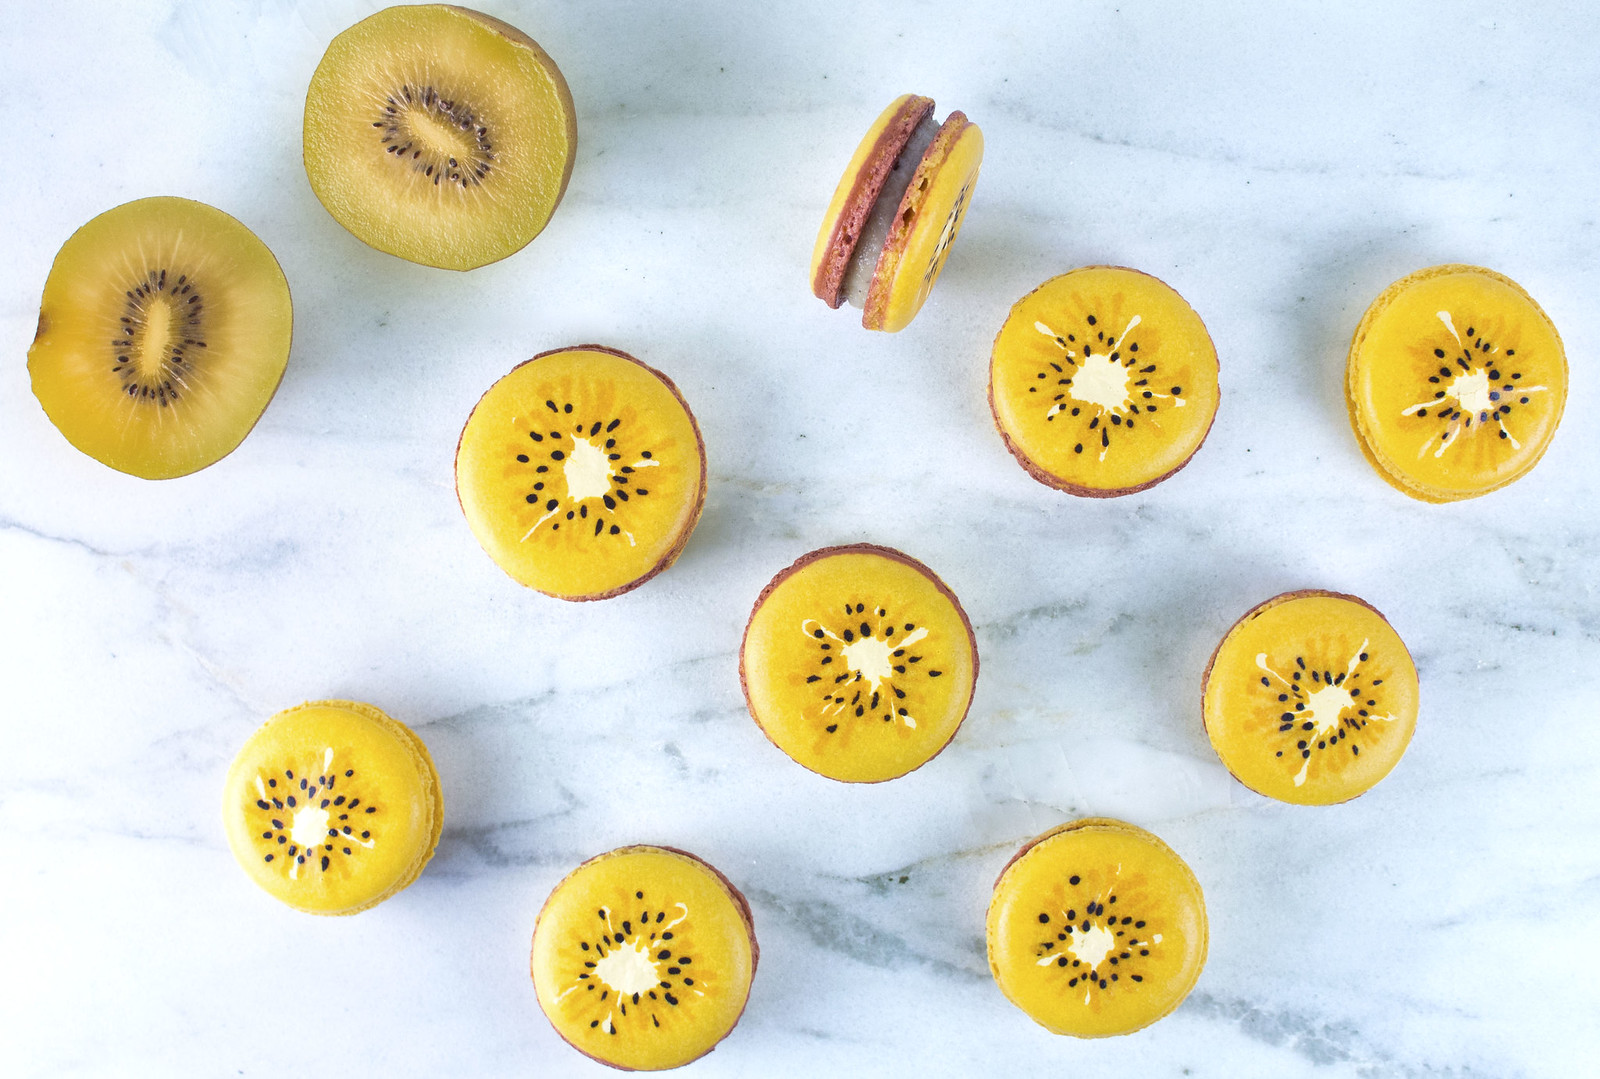
I see golden kiwifruit at the supermarket all the time, and finally decided to buy some. They ended up being delicious and way better than green ones, in my opinion. I highly recommend you try! For these, I used my normal French method recipe. I did, however, scale up slightly so that I could have enough batter for different colors (I normally use 46 almond flour: 43 powdered sugar: 35 egg white: 25 granulated sugar). Also, letting them rest for macaron art with batters is really important. Otherwise they’ll crack :(.
1. Macaron Shells: For about 10 2 inch macarons:
- 66 g almond flour (sift, no big almond pieces)
- 61.5 g powdered sugar
- 50 g egg whites (room temp)
- 36 g granulated sugar
- Oven to 315. Measure out powdered sugar and almond flour into a food processor. Blitz up and make sure it’s very fine (you need this or else you can’t pipe out small details). Sift and then quickly whisk and set aside.
- Make your meringue. I use egg whites from freshly cracked eggs. I put them in a small container and then put this container into a bowl of hot water. After about 5 minutes, the egg whites are room temp. Beat/ whisk your egg whites until frothy and start to incorporate the granulated sugar a bit a time (so it doesn’t go flying everywhere). Beat until stiff peaks. Don’t add any food coloring yet.
- Prepare the batters.
- a. First incorporate the dry ingredients into the meringue so that it is just barely mixed together.
- b. Split the batter into different fractions. For these, I reserved a spatula full for black, a spatula full for yellow white, a spatula full for dark yellow, and two spatula fulls for light brown.
- c. Once batter is sectioned out, add food coloring and folded until the right consistency. You should look up macaronage (folding of ingredients) on Youtube if you don’t know how already.
- In summary: Fold by basically scraping along the edge of the bowl and then pressing down along the center in sort of a J shape. Sometimes, I just scrape along the edge of the bowl. Do this until you have a lava like consistency, where you can pick up your spatula and the batter will drop down in a ribbon and then, incorporate back into the mass after about 10 seconds. Otherwise, I do a few more folds.
- d. Put into piping bags. I have cheapy disposable bags that I use for the fine details. For the yellow and light brown, I use more structurally sound piping bags with tips. For the fine detail batters, snip off a very tiny piece of the piping bag off, so that only a small amount goes out.
- Pipe out your macarons. I use a silpat (would highly recommend). See the video below for reference.
- a. First with the brown batter, hold the tip perpendicularly at about a half inch above the silpat and pipe out an amount slightly bigger than the tip (it should spread horizontally if you don’t move your tip).
- b. Then using the yellow batter, place the tip on the center and pipe out an amount to make a size of a normal macaron (it will cause the brown to spread out).
- c. Using the white yellow, pipe out a center and then a few strands outwards.
- d. Now use the dark yellow to add lines radially outward from the center you just drew.
- e. Finally go through with the black batter and add seeds onto the dark yellow lines.
- Rap the baking sheet against the table a few times. Pop any air bubbles with a toothpick and swirl (carefully) the toothpick around a bit to have that hole close up.
- I normally cheat and dry the macaron shells by holding the tray in the over. However, these designs are often a bit more mixed than normal (since they’re squeezed through the small detail piping bags). Because of that, you should just let them dry the normal way. This is crucial. I have tried rushing to dry and they end up cracking. They need to develop a dried skin in order to rise properly. You want to be able to touch the shell and have it not be sticky.
- I bake for 9 minutes at 315 then rotate the pan and bake for 9 more minutes at 300.
2. Golden Kiwifruit Curd Ganache:
- 1 golden kiwifruit, pureed
- 8 g corn starch
- 40 g granulated sugar
- 1 egg yolk
- 60 g white chocolate
- 30 g heavy cream
- Juice the kiwifruit. I use a hand blender. Heat up in a small saucepan and reduce so it’s not as liquidy.
- Beat the egg yolk and add sugar and sifted corn starch. Whisk well.
- While whisking, slowly add the heated up kiwifruit onto the egg/sugar/cornstarch. You’re tempering the egg to prevent it from scrambling. Once it’s fully incorporated, add the mixture back into the saucepan and stir constantly on medium. Eventually, it’ll start to thicken. I usually thicken until it’s a nice paste. [I also use the hand blender for this (makes it so much easier and the curd is so smooth)].
- Take off the heat and transfer to a bowl (If you have lumps, sieve.) Add a small amount to a piping bag.
- Add cream to a pot and heat until it starts to simmer.
- Meanwhile, add white chocolate over a double boiler and melt the chocolate until there are only a few chips that are unmelted. Take off the heat and add the just simmered cream over the white chocolate. Let sit maybe 30 seconds and then stir to melt the rest of the chocolate for the ganache.
- Now you have to use some discretion. Incorporate some of the curd into the ganache. Your objective is that you don’t want the white choocolate to overpower the kiwifruit and you want it to be able to be pipable. Stir in some curd into the ganache, a little at a time until you think you have the right consistency (I used about 2/3 of the curd). Now let the curd ganache chill. I transfer to a piping bag and chill it in the fridge or freezer for a short while to firm up before piping onto my macaron shells.
- Pipe the curd ganache onto the shells, then squeeze some of the curd into the center (using the reserved curd you put into a piping bag) and assemble macarons.
- Let the macarons rest in an airtight container in the fridge overnight for optimal chewiness!
Additional thoughts:
- The kiwifruit I based my design off of had a circular center! :p
Gluck!
-Mario
Share this post
Twitter
Facebook
Reddit
Email